

A Christmas village does not need to cover a dining table or take over the mantel. With the right combination of book nooks and miniature houses, you can build a glowing Christmas village directly on a bookshelf.
The shelf already gives the display structure. Book nook kits can sit between your books, while freestanding miniature houses can fill open spaces or sit along the top of the bookcase. The result feels like a small winter town unfolding through the shelves rather than a group of unrelated decorations.
This guide explains how to plan your layout, choose compatible miniature Christmas scenes, and arrange the finished kits so that every building remains visible.
Quick Answer: How Do You Make a Christmas Village on a Bookshelf?
Begin with one larger miniature house or detailed book nook as the main scene. Add one or two smaller builds around it, keeping the tallest piece toward the back or at one end of the shelf. Use book nook kits between books and place freestanding miniature houses in open shelf spaces.
Before building, measure the available height, width, and depth. Check the listed finished size of every kit, and make sure its light switch or battery compartment will remain accessible after the display is arranged.
You can see the available shelf inserts and freestanding houses in the Christmas book nook and miniature kit collection.
Start With One Main Christmas Scene
A good miniature Christmas village needs a clear focal point. This is the scene people notice first, so it should have enough height, lighting, or detail to hold the display together.
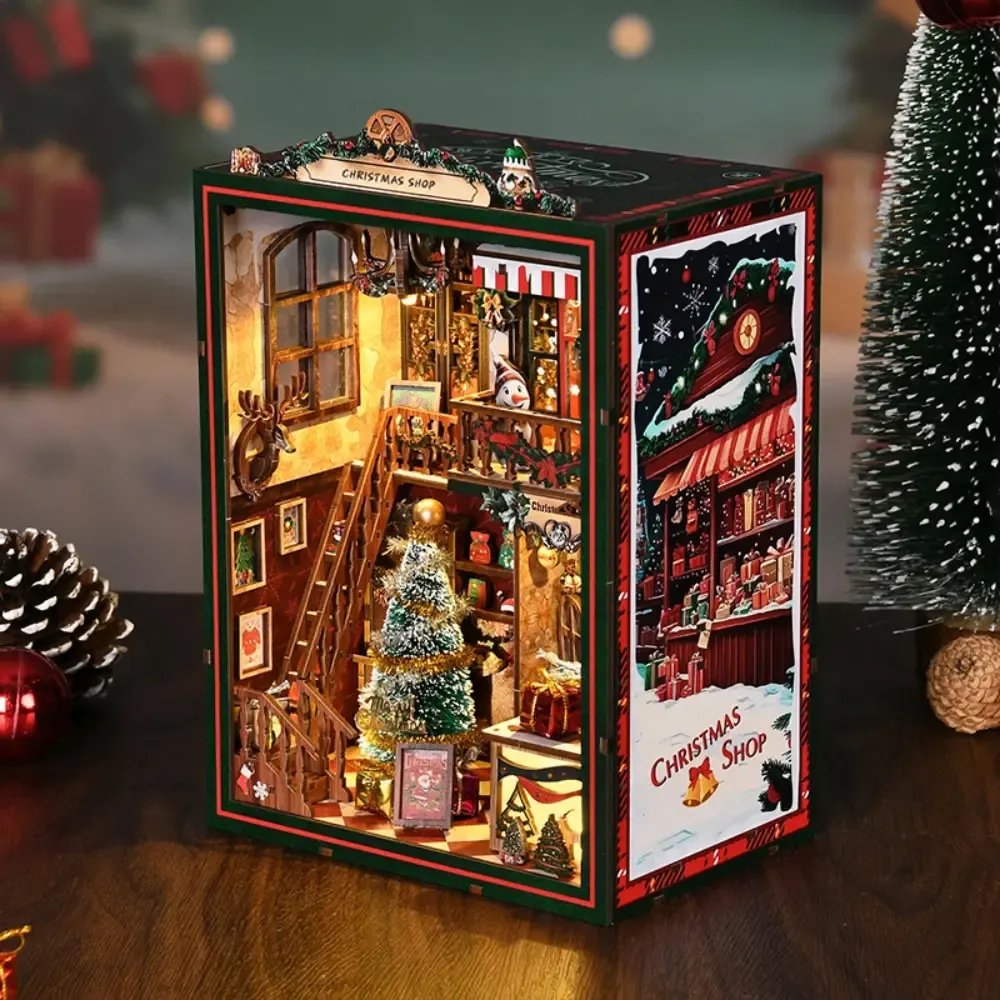
Use a Christmas Shop as the Center of a Bookcase
The Christmas Shop DIY Book Nook Kit works well as the center of a book-filled shelf. It is a 264-piece intermediate build with an estimated build time of four to six hours. Its narrow book nook format allows it to stand between books instead of requiring a completely empty shelf.
Place the Christmas Shop near the middle of a row of books. Leave a little visual space on each side so the illuminated scene does not disappear between dark book spines.
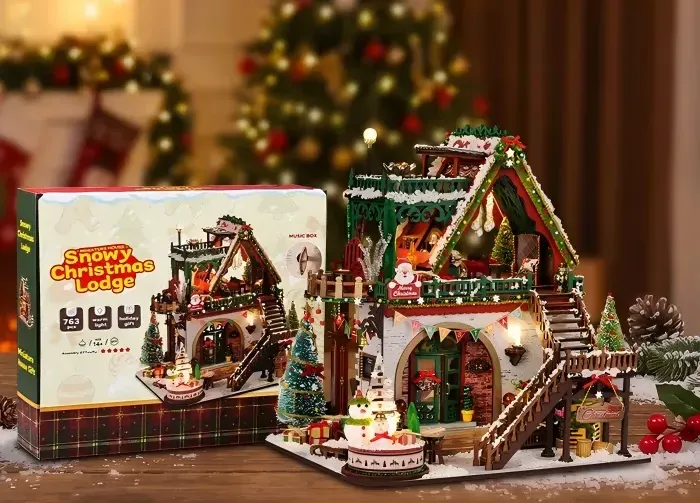
Use a Snowy Lodge for an Open Shelf
If your bookshelf has a wide open compartment, a freestanding house can become the anchor. The Snowy Christmas Lodge DIY Miniature Dollhouse Kit is a 428-piece intermediate build with an estimated build time of six to eight hours.
Its larger house shape makes it better suited to an open shelf than a narrow gap between books. Position it slightly off-center so there is still room to add a smaller house or book nook beside it.
Choose Between Book Nooks and Freestanding Miniature Houses
The most interesting Christmas bookshelf displays usually combine two types of miniature scenes.
Book Nooks Fill the Space Between Books
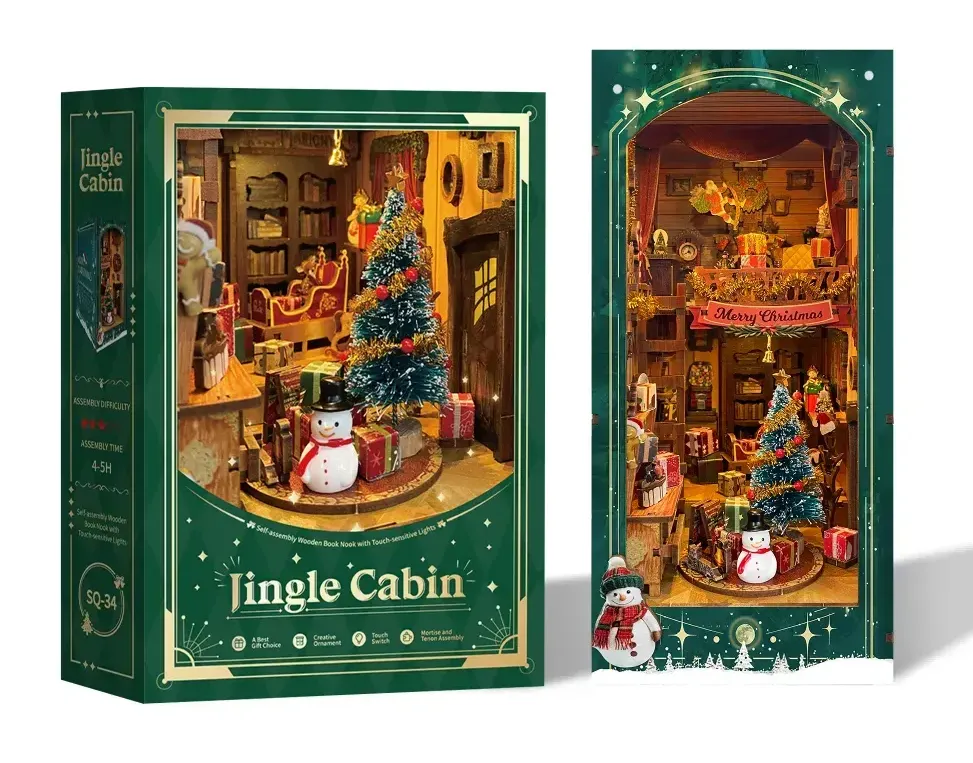
A Christmas book nook stands upright like a large volume and creates depth inside a row of books. It is useful when most of the shelf is still needed for reading material.
The Jingle Cabin DIY Book Nook Kit can introduce a cozy cabin scene without requiring a separate display surface. Place it near winter novels, classic hardcovers or books with darker spines so the illuminated interior stands out.
Miniature Houses Create the Village Shape
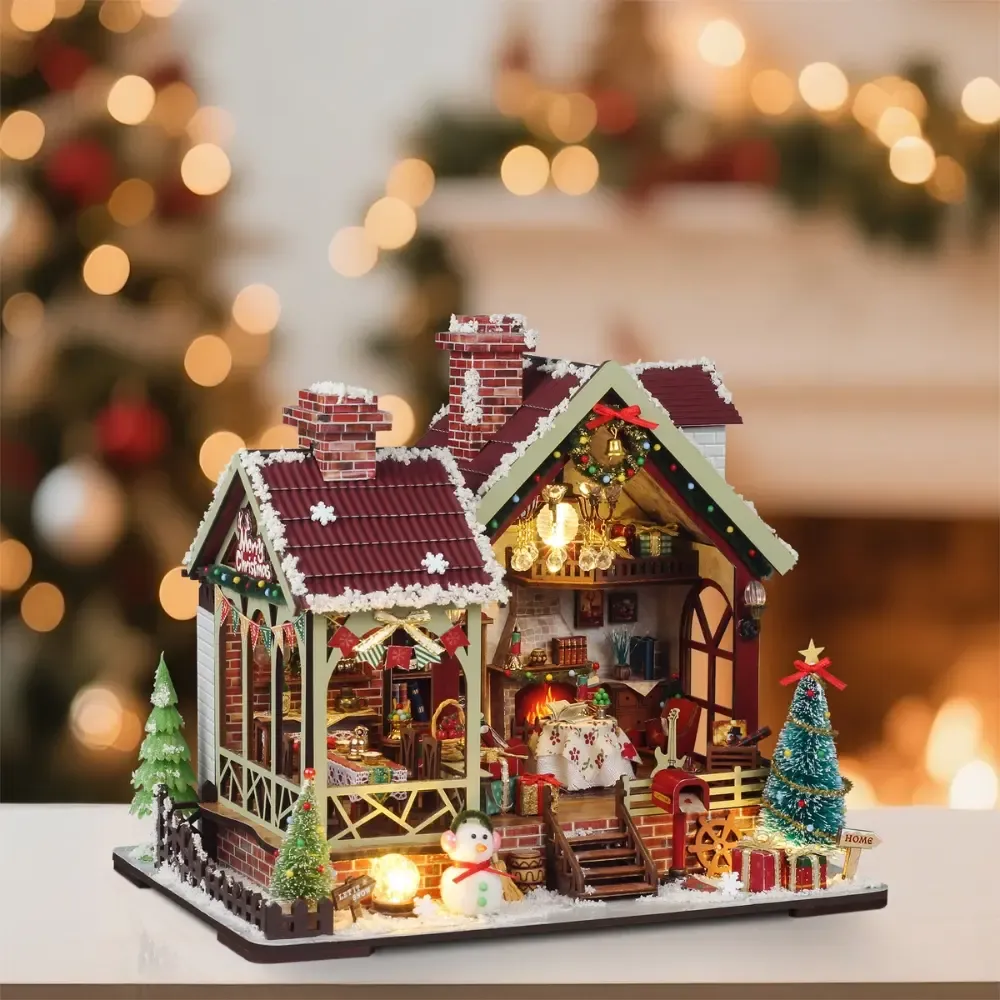
Freestanding miniature houses are wider and can be viewed from more than one direction. They work well on an open shelf, the top of a bookcase, or beside a short stack of books.
The Warm Christmas Lodge Mini House Kit has more than 150 pieces and an estimated build time of six to eight hours. Its smaller piece count makes it a practical starting point for a display that may later grow into a larger village.
Three Christmas Bookshelf Layouts to Try
1. A Single Christmas Scene Between Books
This is the simplest layout and works on a full bookshelf. Remove one or two books and add a single illuminated kit such as the Christmas Shop or Jingle Cabin.
Keep the nearby book spines relatively simple. A highly patterned row can compete with the details inside the book nook. The finished scene should look like a doorway into another part of the shelf.
2. A Miniature Christmas Street
For a wider shelf, arrange two or three miniature Christmas scenes in a loose row. Begin with a larger house, then place a smaller building beside it. Do not line up every front edge perfectly. Moving one scene slightly forward creates more depth and makes the display resemble a small street.
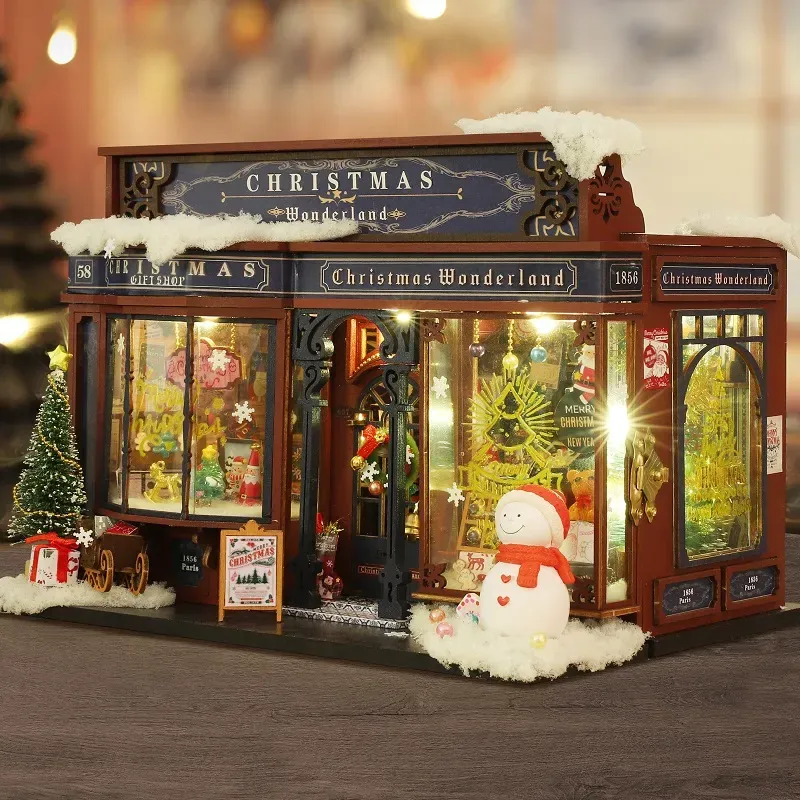
A combination such as the Snowy Christmas Lodge and the Christmas Wonderland DIY Miniature Dollhouse Kit gives the display two different building shapes. Christmas Wonderland is a 200-piece intermediate kit with an estimated build time of six to eight hours.
If the shelf is deep enough, position the taller lodge toward the back and the Christmas shop slightly forward. Keep enough room around both models to reach their lighting controls.
3. A Christmas Village Across Several Shelves
You do not need to keep the entire village on one level. A book nook can form the upper part of the town while miniature houses sit on the shelf below.
For example, place the Christmas Shop between books on the upper shelf and use the Warm Christmas Lodge below it. The repeated Christmas lighting connects the two scenes even though they are not physically side by side.
This layout is especially useful when one shelf is too narrow for several miniature houses. It also gives each finished build enough space to be seen clearly.
Arrange the Village Before You Begin Building
It is tempting to choose several kits first and think about the display later. Measuring the shelf before building helps prevent a finished miniature from being too deep, too tall, or difficult to switch on.
- Measure the shelf opening. Record its width, height, and usable depth.
- Check each finished size. Use the measurements listed on the individual product page, not the package size.
- Choose the main scene. Decide which house or book nook will attract the most attention.
- Plan access to the lights. Leave room to reach the switch and battery compartment.
- Arrange the largest build first. Add smaller scenes only after the focal point has a clear position.
If you are unsure how many kits will fit, begin with one book nook and one freestanding house. The Christmas collection lists the build time, piece count, and finished size for each available project.
Keep Different Miniature Christmas Scenes Connected
A village can include shops, cabins, and snowy houses without looking mismatched. The key is to repeat a few visual ideas rather than choosing buildings that are identical.
- Repeat warm lighting. Place lit scenes close enough that their glow feels connected.
- Vary the building heights. A taller lodge beside a lower shop creates a more natural skyline.
- Mix open and enclosed scenes. A freestanding house shows its exterior, while a book nook creates a deeper view into a street or room.
- Leave some empty space. A small gap helps each miniature remain visible.
- Keep the books involved. The display should still feel like part of a bookshelf rather than a separate decoration placed in front of it.
The Christmas Wonderland shop can provide a colorful street scene, while the Snowy Christmas Lodge creates a larger winter building. Their different shapes help the village feel collected over time.
Choose a Kit That Matches Your Available Time
A bookshelf village does not need to be completed in one weekend. Building one scene at a time makes the project easier to manage and allows the display to grow throughout the season.
| Kit | Type | Pieces | Estimated Build Time |
|---|---|---|---|
| Christmas Shop | Book nook | 264 | 4 to 6 hours |
| Warm Christmas Lodge | Miniature house | 150+ | 6 to 8 hours |
| Christmas Wonderland | Miniature house | 200 | 6 to 8 hours |
| Snowy Christmas Lodge | Miniature house | 428 | 6 to 8 hours |
Build times are estimates. Your experience, pace, and the amount of time spent arranging small details may change the total.
How to Store Your Christmas Village After the Holiday
Seasonal miniature scenes can be brought back each year if they are stored carefully. Remove batteries before long-term storage, keep the instructions with the model, and avoid placing loose decorations directly against delicate parts.
If you still have the original product box, use it to store the model or its separate pieces. Keep book nooks upright and support freestanding houses so they cannot slide around inside a larger container.
Before packing everything away, take a photo of the completed Christmas bookshelf display. The image will make it much easier to recreate the same arrangement next season.
Build Your Christmas Village One Scene at a Time
The best Christmas village is not necessarily the largest one. A single glowing book nook between favorite books can be enough to change the mood of a shelf. A miniature lodge and shop can create a fuller winter street when more room is available.
Start by measuring your shelf, select one anchor scene, and give it enough space to be noticed. You can add another house next year, rearrange the village across several shelves, or keep the display simple with one carefully chosen build.
Browse all Christmas book nook kits and miniature houses to compare their finished sizes, piece counts, and estimated build times.
If you are choosing a kit as a present rather than building a display for your home, read our Christmas gifts for book lovers guide.
Frequently Asked Questions
Can I put a Christmas village on a bookshelf?
Yes. Book nook kits can stand between books, while freestanding miniature houses can sit in wider shelf compartments or on top of a bookcase. Measure the shelf and check each kit's finished size before choosing your layout.
How many miniature houses do I need for a Christmas village?
You can begin with one or two scenes. One book nook and one freestanding miniature house are enough to create a small display. Additional buildings can be added over time if the shelf has enough open space.
What is the difference between a Christmas book nook and a miniature house?
A Christmas book nook is a narrow scene designed to stand between books. A miniature house is usually wider and freestanding, making it better for an open shelf, table, or mantel.
Which kit should be the center of the display?
Choose the scene with the strongest height, shape, or level of detail. A larger build such as Snowy Christmas Lodge can anchor an open shelf, while the Christmas Shop can become the focal point within a row of books.
Should all the Christmas village buildings match?
No. Different shops, cabins, and houses can work together when they share a few visual elements, such as warm lighting, snowy details, or festive colors. Varying the height and shape can make the village feel more natural.
How do I arrange lights in a miniature Christmas village?
Use the lighting included with each applicable kit and leave the switches accessible. Avoid pushing a completed model so far back that you must move other buildings whenever you want to turn it on.
Can I build the village over several years?
Yes. Starting with one anchor scene and adding another miniature each Christmas can make the display easier to build, arrange, and store.
Want more book nook ideas? Follow us for build guides, gift inspiration, and new kit drops on our Substack | WordPress | Medium | Tumblr | Ideal House | Linktree